
Electronics
This document describes the general use of the iOS application for the compositions
Irrgaerten, for two pianos and electronics (2010)
behind the light, for string quartet and electronics (2011)
entwurzelt, for six singers and electronics (2012)
under, for ensemble and electronics (2013)
resonating lines, for violin, violoncello, piano, percussion and electronics (2015)
voice-unrooted, for soprano and electronics (2016)
moments before the eruption, for seven instruments and electronics (2018)
The electronics are divided into separate events, to be triggered by one musician at the indicated moments in the score.
There is no other method of synchronization and no use of a click track. I prefer that the musicians are interpreting their part and that the electronics are re-aligned at the beginning of each event to that interpretation.
Triggering the events can be done in several ways and depends on the specific composition.
- pressing the touch button on the interface
- using a MIDI sustain pedal with the MIDIExpression converter
- MIDIExpression converter with USB cable
- MIDI sustain pedal
- MIDIExpression software for iOS
- USB to Lightning adapter (Apple camera kit)
- using an AirTurn PED pedal
- using BlueBoard with a sustain pedal
- BlueBoard
- MIDI sustain pedal
- iRig BlueBoard application for iOS
The use of a sustain pedal with the MIDIExpression converter has proved to be the best solution at the time of writing (spring 2018).
It does not introduce latency between the pedal action and the start of the sound. The pedals using Bluetooth to communicate with the iPad have some latency – often not even consistent, which makes the synchronization less precise.
The three pedal options and their configuration is outlined below.
using a MIDI sustain pedal with the MIDIExpression converter by Audiofront
This is the most accurate transmission of the pedal information, as the MIDIExpression converter connects with a USB cable and a USB to Lightning adapter directly to the iPad.
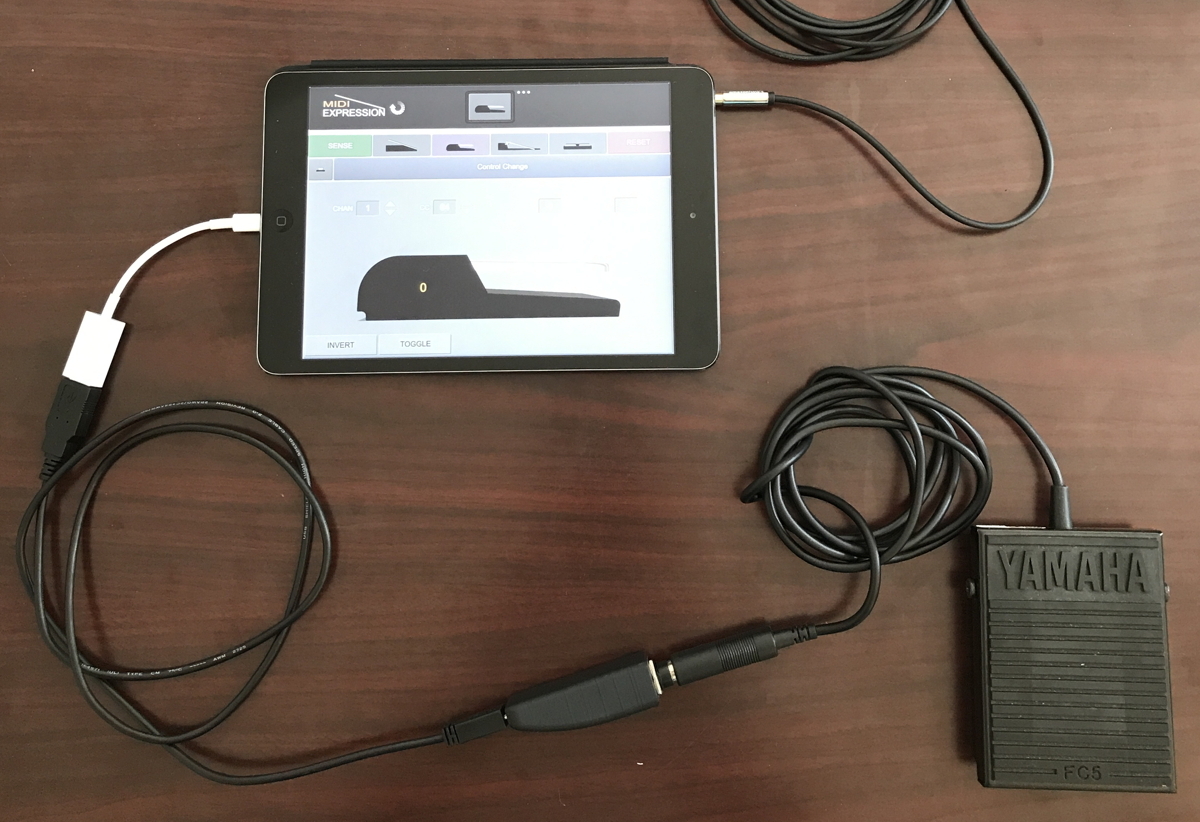
The MIDIExpression converter is manufactured and shipped from Thailand – you need to anticipate for the shipping time, depending on your location.
https://www.audiofront.net/MIDIExpression.php
First download the MIDIExpression software and configure it to the type of pedal you are using.
Always start the MIDIExpression software first and then my iOS application. Pressing the sustain pedal will trigger the next event as my program is listening to the internal MIDI messages sent from the MIDIExpression software.
installing the software
Download the application from the Apple AppStore. After launching it for the first time, the sound files need to be downloaded. Press OK.

iPad interface
The main screen contains the following elements:
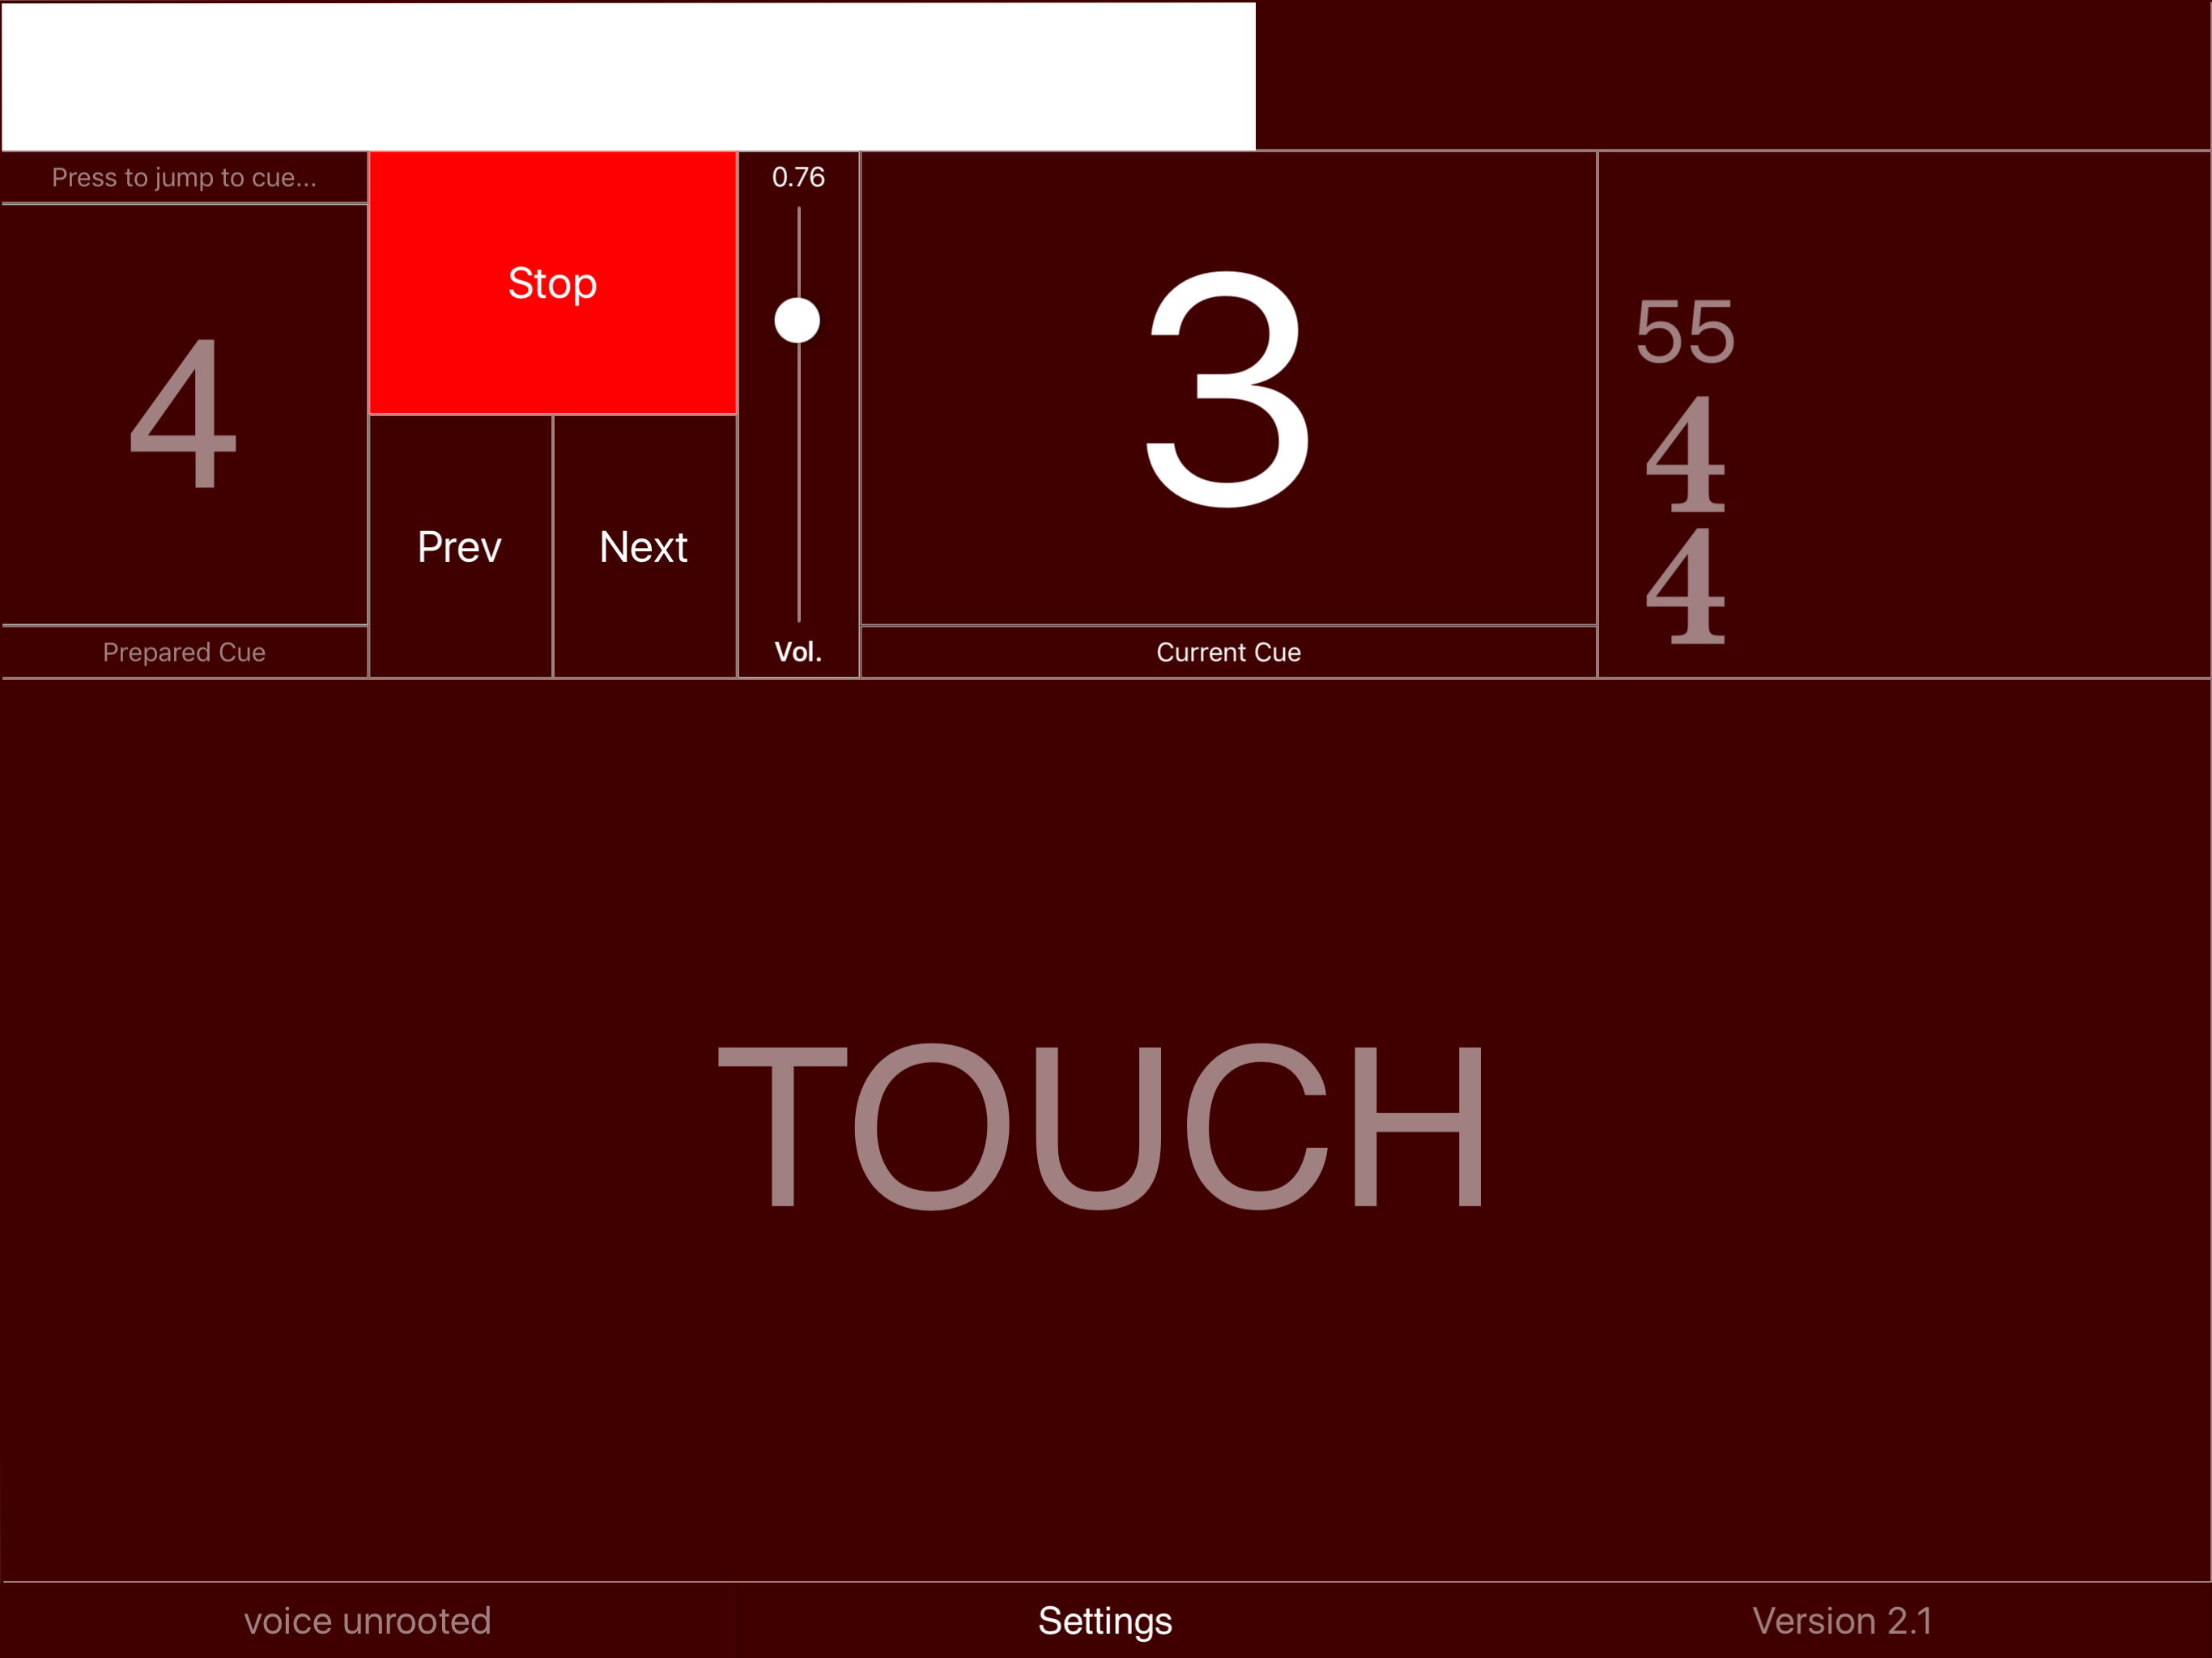
The white progress bar on the top scrolls from left to right over the ‘ideal’ duration of the event. If the performer chooses a slightly faster tempo, the following event can be triggered early. The previous event will fade out to ensure a continuous sound from the electronics. If the performer plays at a slower tempo, the electronics of the current event will continue for a few seconds. When the musician reaches the next event in the score, he triggers and re-synchronizes the electronics to his performance.
After starting an event, the touch button and pedal are disengaged till two seconds before the next event to avoid accidental triggering.
The large number in the upper center indicates the current event.
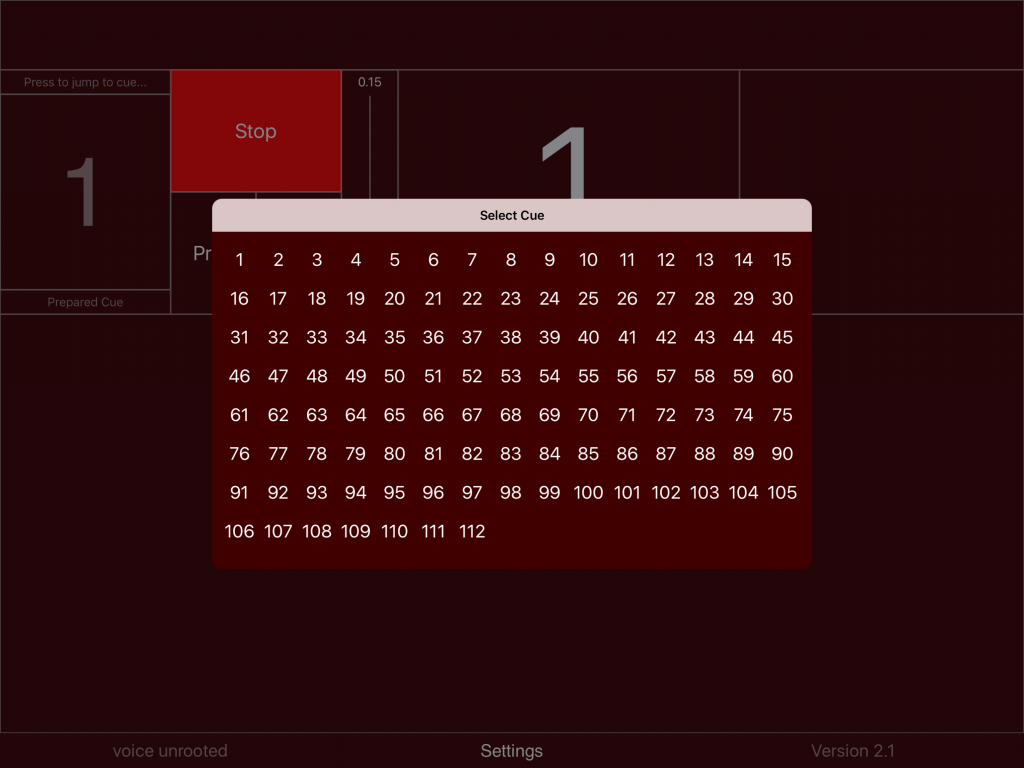
The ‘prepared cue’ on the upper left shows the next event to be triggered. Touching the number brings up the cue selection screen to maneuver to a different event during the rehearsal process.
One can also go to adjacent events with the Prev/Next buttons.
The volume slider controls the general playback volume.
The upper right area holds information about the bar structure and tempo. It can also be used as a visual metronome, where downbeats flash the full surface of the rectangle with a white color, whereas upbeats only fill the rightmost third of the rectangle. The visual metronome needs to be enabled in the settings dialog (see below).
The application also provides an audible metronome for rehearsal purposes. If activated in the settings (see below), two additional sliders appear at the upper right:
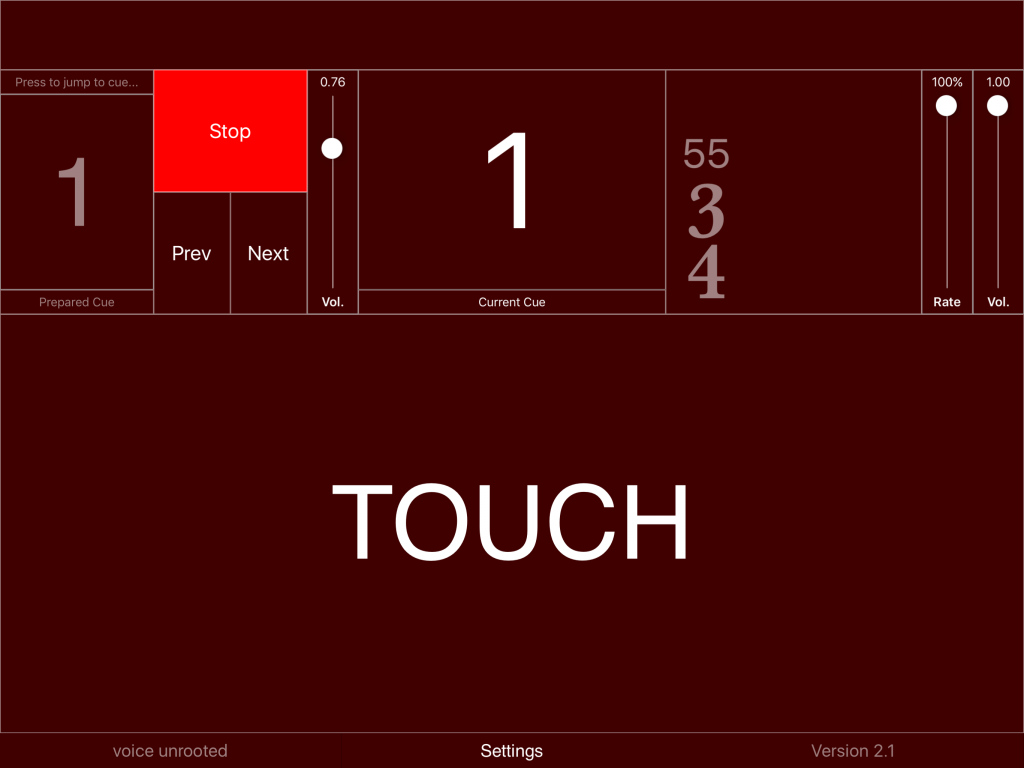
The volume slider controls the volume of the metronome. By bringing the volume of the electronics (next to the stop button) to zero, one can rehearse with the metronome only. The rate slider permits to rehearse at a slower tempo (50-100%). If the rate is not at 100%, playback of the electronics is muted.
Settings dialog
The loudspeaker test should be performed to check that the cabling of the speakers is performed correctly and that both speakers are working. Switching the tuning sound on gives the possibility to tune the iPad to a reference pitch. The next two buttons control the metronome.
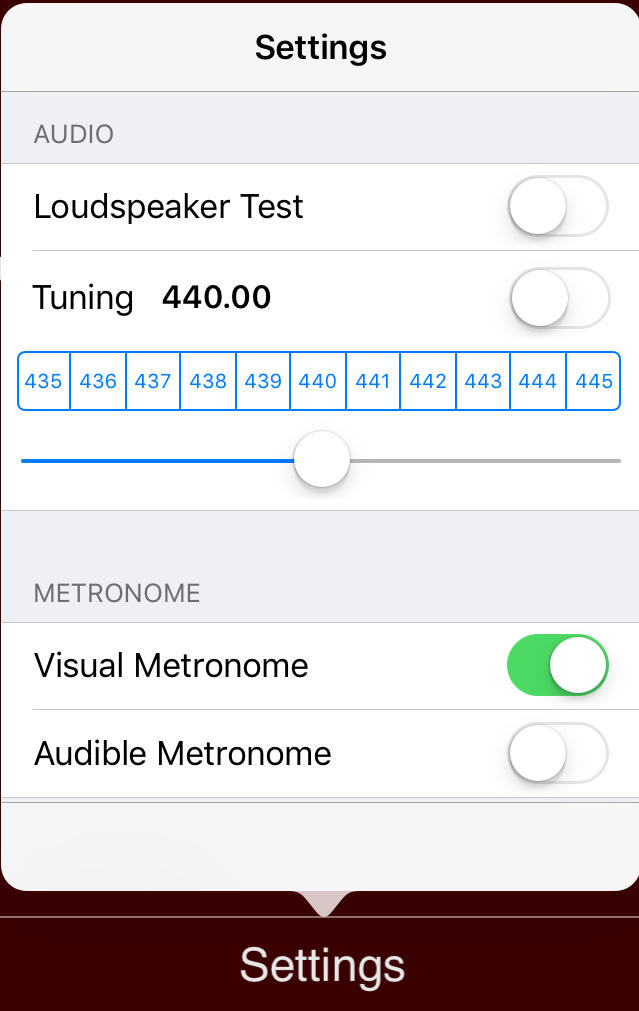
Scrolling further down on the settings:
Autoplay is another option for rehearsals, where all events are triggered without input from the touch button or pedal.

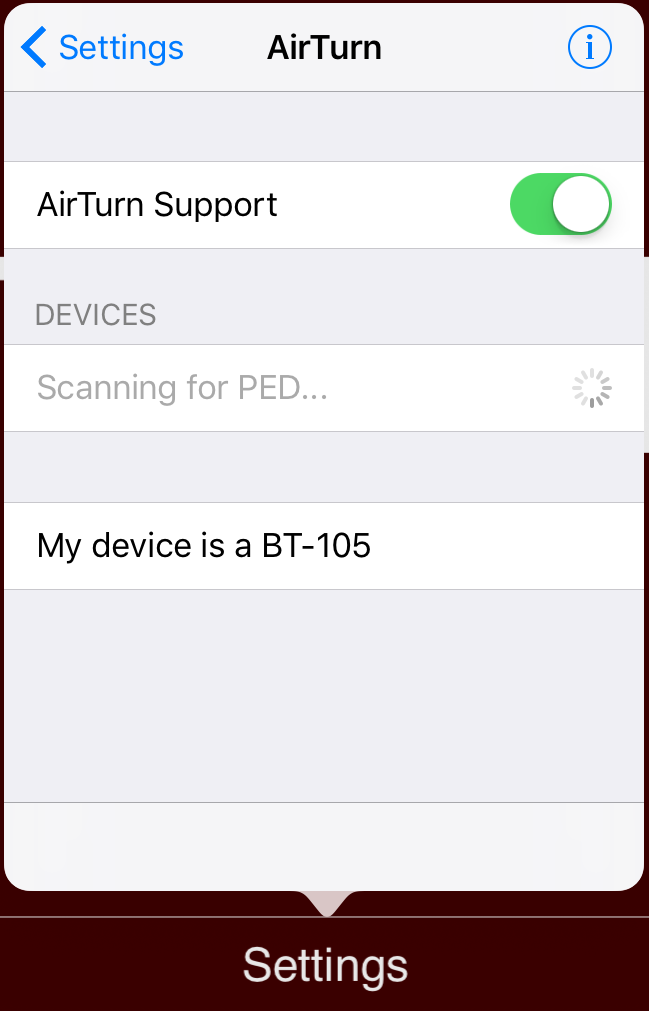
AirTurn brings up the menu to pair an AirTurn PED pedal.

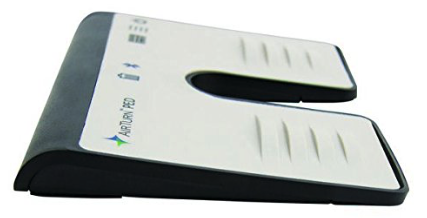
The first generation of AirTurn BT-105 is not recommended as the BlueTooth protocol is different and triggering introduces an unpredictable delay between the action and the start of the sound file.
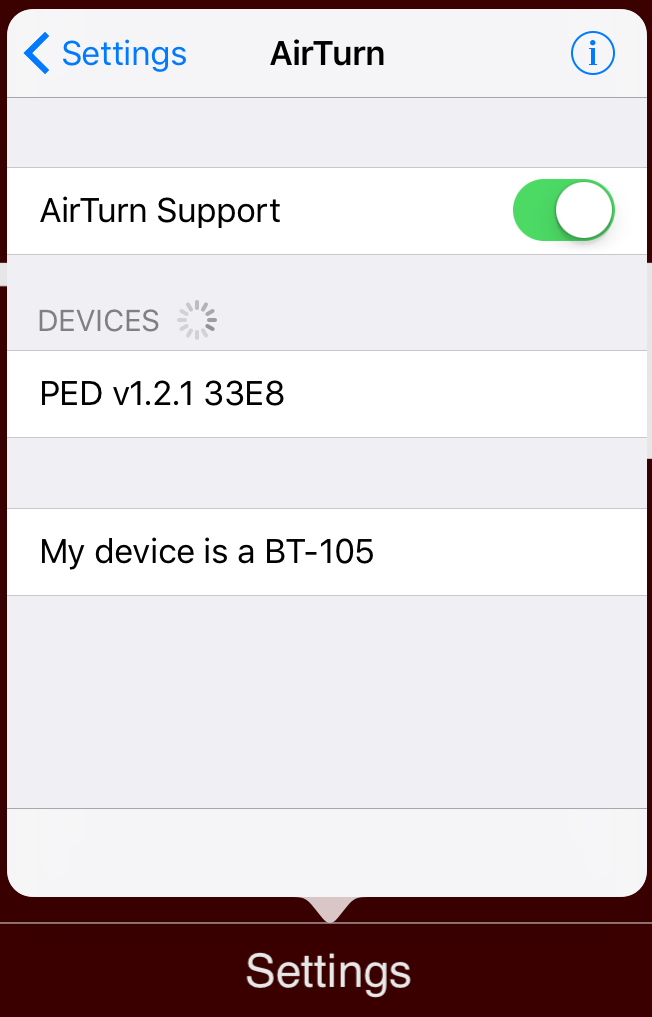
To pair the AirTurn PED, enable the AirTurn Support and press ‘My device is a PED.’
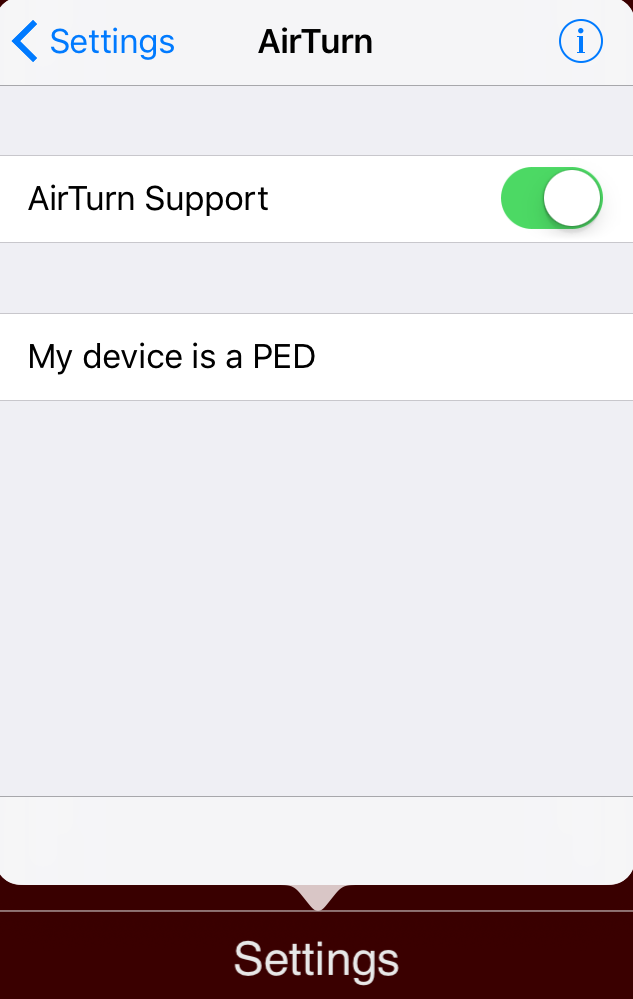
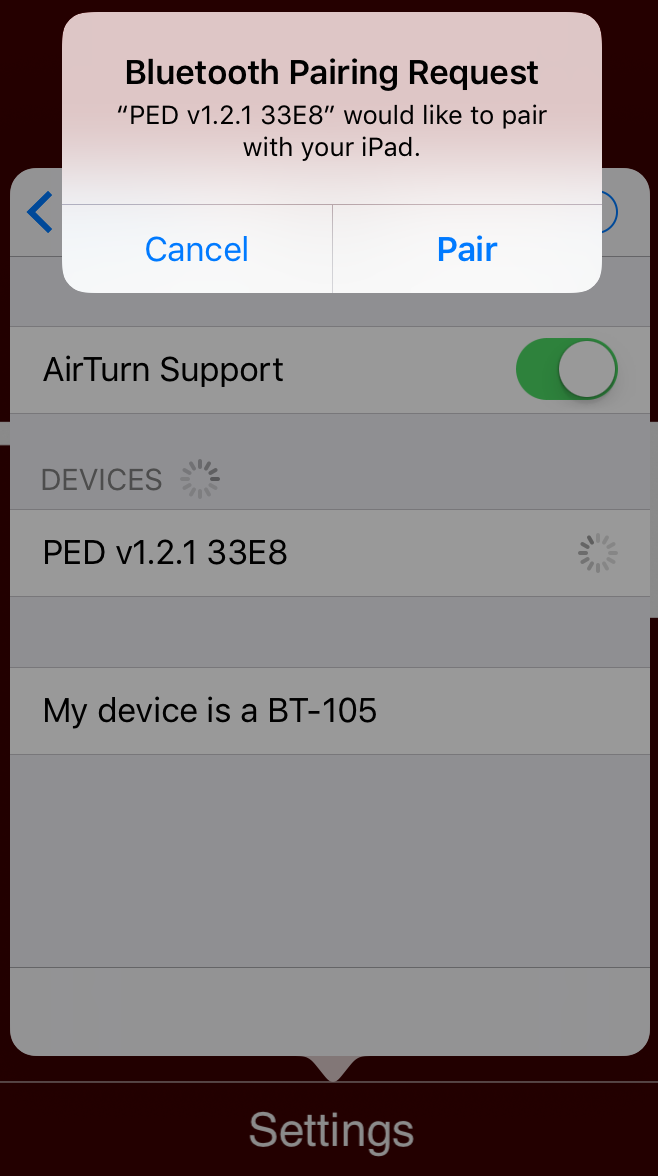
Press the on/off button (1) on the PED. Press button 2 and release after the first red flash on the battery symbol. This switches the PED into PED-APP-Direct mode.
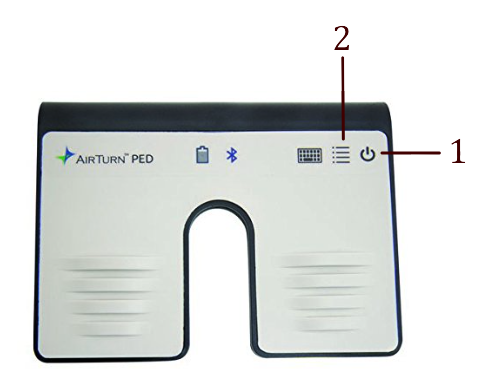
If no device is found, press button 1 on the AirTurn for 7 seconds to reset Bluetooth pairing. After the device turns off, press button 1 again. Once the AirTurn is found, the following messages need to be confirmed.


Exit the settings dialog by tapping on a different area of the main screen.
Using the BlueBoard with a sustain pedal
Another way of triggering the sound files is by using the BlueBoard and attaching a MIDI sustain pedal to the external input one.

Start the BlueBoard application before opening ‘voice-unrooted.’

Calibrate the foot pedal for EXT 1, then open ‘voice-unrooted.’ Pressing the sustain pedal will trigger the next event as ‘voice-unrooted’ is listening to the MIDI messages sent from the BlueBoard application.
update events
The electronic score is stored in a database on the device, independent of the sound files. Each event is marked in the musical score with a number. Each event contains the information as to which sound file to play, volume, durations, etc. If corrections to this electronic score become necessary, the musician can download a new database. This provides a possibility for corrections, without downloading the entire application anew. The location of this updated file is known to the application. Thus no further information is necessary. Just press the button and wait for the confirmation message. For the update to work, you need obviously a connection to the internet – through the phone provider or WIFI.
update sound files
Similarly to the events, sound files can be updated to the latest version.